In this tutorial, we will learn How to Install WordPress on AWS Lightsail Ubuntu OS. In this tutorial, we will mainly focus on OS-level configuration customization instead of using an inbuilt AWS Lightsail WordPress instance with all default settings because this will give us the privilege to use our instance with full capacity by adding multiple websites, and even Django like framework can be installed and configured seperately along with WordPress. We will use Ngnix we server NOT Apache which will give better performance.
Sign up for AWS LightSail
To signup for Amazon Lightsail VPS we need a credit card, although the first month of AMazon Lightsail usage is absolutely free; however, we still require credit to at least register an account with AWS Lightsail. For this, go to the official page of AWS Lightsail, for your convenience here is the link to that.From the AWS page, click on the “Get started with Lightsail for Free“, create an account, provide credit card information and wait for few seconds to get the account creation confirmation on your provided email. This will not only provide you 1 month free trial of AWS Lightsail but also 12 months of free usage of the EC2 computing engine. However, right now let’s just focus on the topic.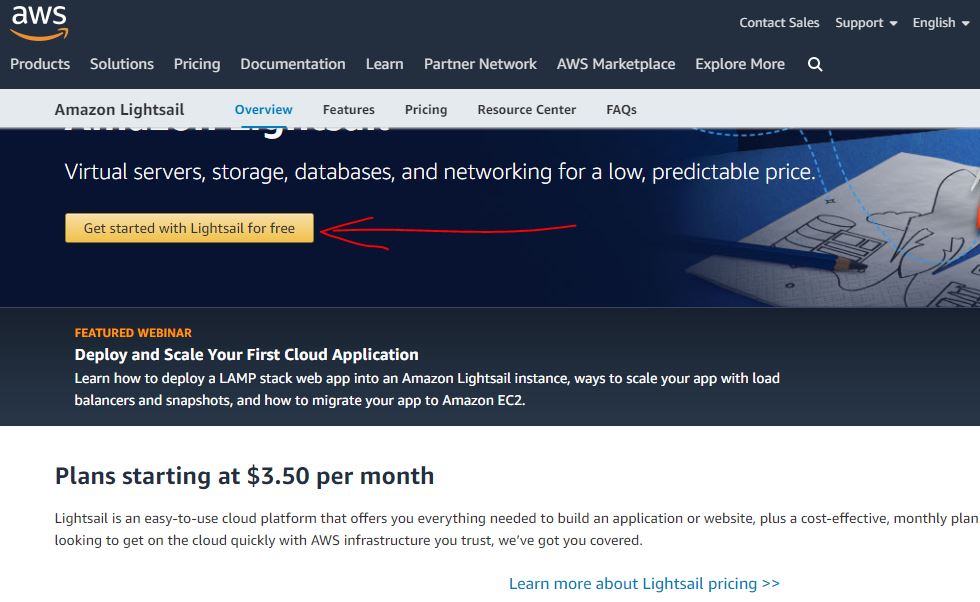
Access the AWS Lightsail Portal
Once you got your AWS account activated, log in to that and you will stumble on the AWS management console page. Click on the All Service drop-down option to see all the available Cloud computing services of AWS. From there select the LightSail service option.Alternatively, you can directly click to this link which drops you on the main landing page of this cloud VPS.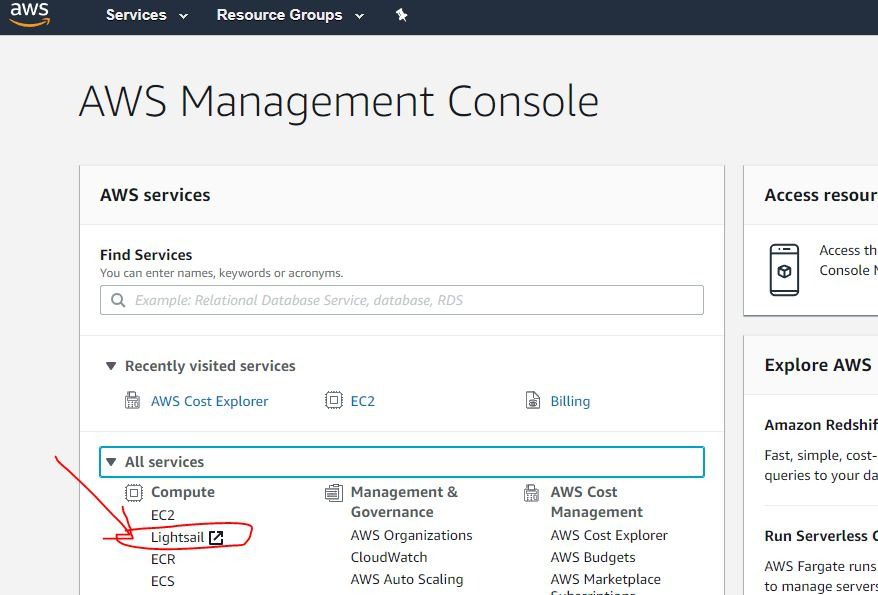
Create AWS Lightsail Instance
On the main page of this VPS service, you will find tabs to create instances, Database, Networking, Storage, and Snapshots. The first thing which we do for the Amazon Lightsail WordPress installation is to create an instance.Click on the Create Instance button.
Choose Amazon Lightsail Data Centre Region
When we click on the Create instance button, a new page will open, showing different options to set up a server. The first object in the row is the selection of the data center region. By default, the AWS Lightsail will automatically select the nearest one to your vicinity, however, you can opt for one of your choices by clicking on “ChangeAWS Region and Availability Zone”. Once you selected the Instance zone, move to the next step.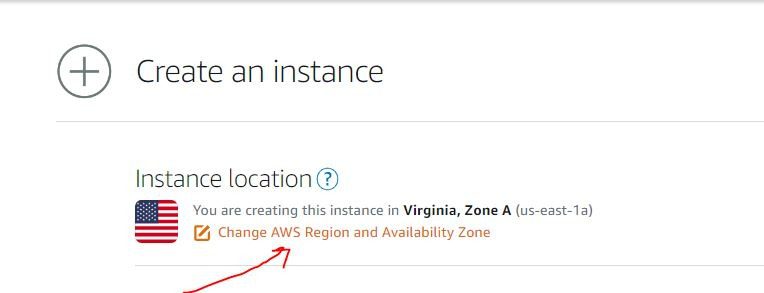
Select Lightsail Linux Platform and OS Only Blueprint
To make the tutorial and installation of WordPress on Amazon Lightsail here we will approach a little bit differently by NOT choosing WordPress instance but, we will choose an option “OS Only” as Blueprint with Ubuntu 20.0 instance. This will give us a plain Ubuntu OS that will give us more freedom to customize it.Note: If you want to install everything automatically then please proceed with Apps+OS -> WordPress instance for easy installation with less customization.
Choose AWS Lightsail Instance Pricing/Cost
The next thing in the steps to install WordPress is to choose any of the Lightsail price plans. If you just want to try it for a month (750 hours) preceding with the cheapest plan then go for the $3.50 USD one. In that, you will get 512 MB RAM, 1 vCPU, and 20GB SSD configuration which is basically enough for a basic starter WordPress website or blog. However, later with an onerous load on the website because of traffic, a user can shift to any other high resource plan without losing the data by creating a snapshot.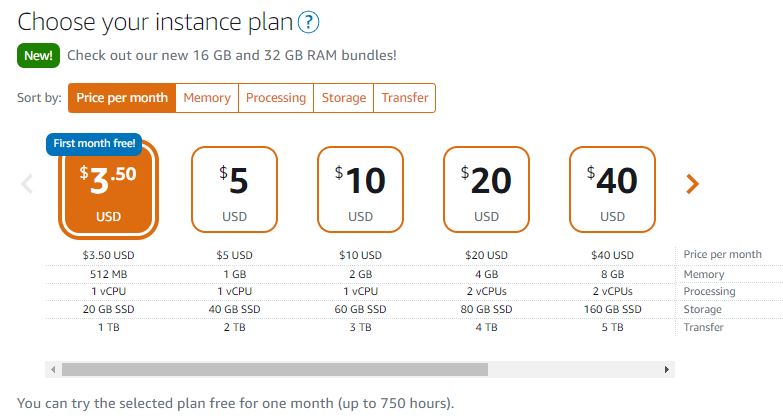
Identify Your Instance
At this step, although the AWS Lightsail will automatically provide a name to your instance, depending on your configuration you can change it manually. Here we are going with the default one that is Ubuntu-1 (As this is Ubuntu OS Instance), you can change and named it to whatever is feasible and easy to remember for you, like WordPress-1If you have any plan to install multiple apps on your Lightsail then you can assign some tags to each instance to easily recognize, filter and manage them. (skip it if you seeking to install the only instance)Finally, click on the Create Instance button.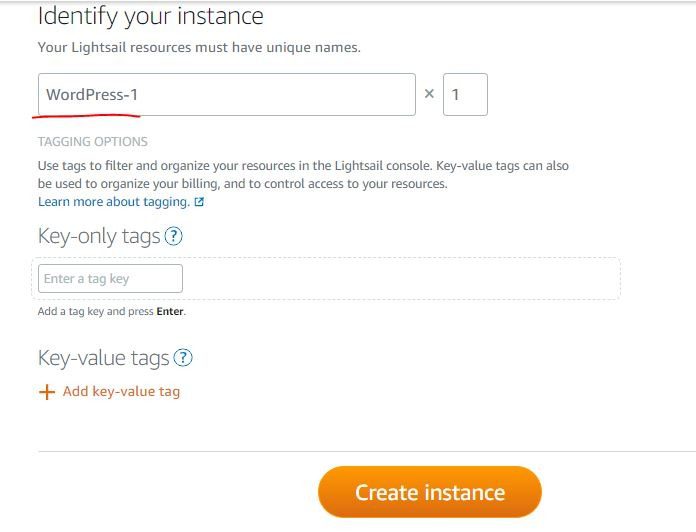
Access Ubuntu OS Instance
The newly created instance will appear under the Instances tab of AWS Lightsail. Click on that to access further options. SSH to the instance using Generated Key Pair or use in-browser SSH option to log in.
Now Proceed with Ubuntu OS Level Steps
Add Certbot Repository
sudo add-apt-repository ppa:certbot/certbotIf the above command is NOT working for you try the below one.
sudo add-apt-repository -r ppa:certbot/certbotUpdate Server
sudo apt update && sudo apt upgradeInstall Packages
sudo apt install curl mysql-server nginx php-curl php-fpm php-gd php-intl php-mbstring php-mysql php-soap php-xml php-xmlrpc php-zip python3-certbot-nginxSetup MySQL
sudo mysql_secure_installationAnswer Y to all options and also provide a strong MySQL login credential.
Tune MySQL for Lower Memory [Optional]
sudo nano /etc/mysql/mysql.conf.d/mysqld.cnfFile Content:
innodb_buffer_pool_size = 20M
innodb_buffer_pool_chunk_size = 16M
innodb_buffer_pool_size = 16M
key_buffer_size = 8M
query_cache_size = 8M
skip_name_resolve
Create Nginx Config
sudo nano /etc/nginx/sites-available/mytechmint.comSample File Content:
server {
listen 443 ssl http2 default_server;
root /var/www/mytechmint.com;
index index.php;
server_name mytechmint.com www.mytechmint.com;
location / {
try_files $uri $uri/ /index.php?$args;
}
location ~ \.php$ {
include snippets/fastcgi-php.conf;
fastcgi_pass unix:/var/run/php/php7.2-fpm.sock;
gzip on;
gzip_disable "msie6";
gzip_vary on;
gzip_types text/plain text/css text/javascript image/svg+xml image/x-icon application/javascript application/x-javascript;
}
location ~ /\.ht {
deny all;
}
location = /favicon.ico { log_not_found off; access_log off; }
location = /robots.txt { log_not_found off; access_log off; allow all; }
location ~* \.(css|gif|ico|jpeg|jpg|js|png)$ {
expires max;
log_not_found off;
gzip on;
gzip_disable "msie6";
gzip_vary on;
gzip_types text/css text/javascript application/javascript;
gzip_static on;
}
}
server {
listen 80;
return 301 https://$host$request_uri;
server_name mytechmint.com www.mytechmint.com;
return 404;
}
Activate New Nginx Config
sudo ln -s /etc/nginx/sites-available/mytechmint.com /etc/nginx/sites-enabled/Remove Default Nginx Config
sudo rm /etc/nginx/sites-enabled/default
sudo rm /etc/nginx/sites-available/default
Download Certificate
sudo certbot --nginx -d mytechmint.com -d www.mytechmint.comTest Certbot Renew
sudo certbot renew --dry-runSetup Certbox Cron
sudo crontab -e
10 2 * * * /usr/bin/certbot renew --quiet --pre-hook "/bin/systemctl stop nginx" --post-hook "/bin/systemctl start nginx"
Turn Off Server Identification
sudo nano /etc/nginx/nginx.conf
server_tokens off;
Check Nginx Config
sudo nginx -tSetup Database
sudo mysqlCREATE DATABASE wordpress DEFAULT CHARACTER SET utf8 COLLATE utf8_unicode_ci;
CREATE USER 'wordpressuser'@'localhost' IDENTIFIED BY 'wordpresspass';
GRANT ALL ON wordpress.* TO 'wordpressuser'@'localhost';
FLUSH PRIVILEGES;
exit;Replace required fields with suitable values for your website, like required user [wordpressuser] and password [wordpresspass].
Restart Services
sudo systemctl restart php7.2-fpm
sudo systemctl reload nginx
sudo systemctl restart mysql
Change php7.2-fpm with required values because for your server PHP version installed may be of different. Check PHP version using the below command.
php --versionInstall WordPress
cd ~
curl -LO https://wordpress.org/latest.tar.gz
tar zxvf latest.tar.gz
cp wordpress/wp-config-sample.php wordpress/wp-config.php
sudo cp -a wordpress/. /var/www/mytechmint.com
cd ~
rm -fR wordpress
sudo chown -R www-data:www-data /var/www/mytechmint.com
Configure WordPress
sudo nano /var/www/mytechmint.com/wp-config.phpNow update DB_NAME, DB_USER, DB_PASSWORD with corresponding required values that are with values we generated during MySQL setup above.
Also, update WordPress secret keys or salt keys with a unique value for your website. You can get unique salt keys by executing the below command in a separate shell terminal.
curl -s https://api.wordpress.org/secret-key/1.1/salt/Sample value of WordPress salt keys:
define('AUTH_KEY',         '4:%Y:d/h>`m|rE?CUuQg7/4XRndkb?by~N+OIp.G3Zh=/?x-+D*EFw|_8]x4');
define('SECURE_AUTH_KEY',  'MStA[#<W7(%PxKS&|Z!|{Y<uL!ieu?~J1B|H0j]+CSuM*#/ 6Wqe;{5rz_S+#-Xj');
define('LOGGED_IN_KEY', 'o8Ag5$JIFiD-SH_k5+^]8$8z$JZ0{|y0T#hp{Zka+}2}DwM]`[FX0axB>`f%5`zu');
define('NONCE_KEY',        'tZpM4[dL5Te$>9I+297 Tw=d:0d.8DS|]ksSrGwP7KkC?gd8nc-1R;qz5bPaPM97');
define('AUTH_SALT',        'W065tYwd5e8AO^)]4ihtRmRNh<s=b+aJi=sS0TVb}^b<#a%rmztaNuDAVrat{wE8');
define('SECURE_AUTH_SALT', 'KyTzm#lP7On+N~s} JZ)]+w-`hDw]E|gC%J^i0bX9Pbdy~^0N},s}4 :fD_jRhCV');
define('LOGGED_IN_SALT', 'Q>g=$DV[CDSR(y^NDSL<D-s6pGl87JM2VmQw`O%g-~{cN-%RDpcolA3Gd~-qJyTI');
define('NONCE_SALT', 'EJZUe]/Hy8|>GiQ^L@nxeNbuMt#tv[9cQCDmZ9!dY5={]_E-t4dz4vrTb- i-d5`');
Now add the below line at end of wp-config file:
define('FS_METHOD', 'direct');Setup Firewall
sudo ufw default deny incoming
sudo ufw default allow outgoing
sudo ufw allow ssh
sudo ufw allow http
sudo ufw allow https
sudo ufw enable
sudo ufw status