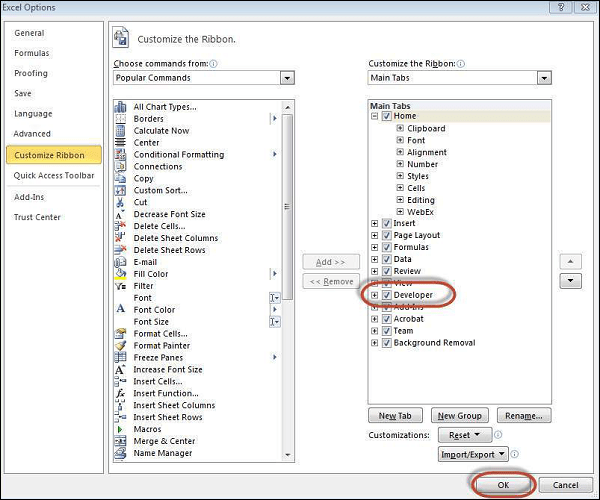
Step 1 − First, enable ‘Developer’ menu in Excel 20XX. To do the same, click File → Options.
Step 2 − Click ‘Customize the Ribbon’ tab and check ‘Developer’. Click ‘OK’.
Step 3 − The ‘Developer’ ribbon appears in the menu bar.
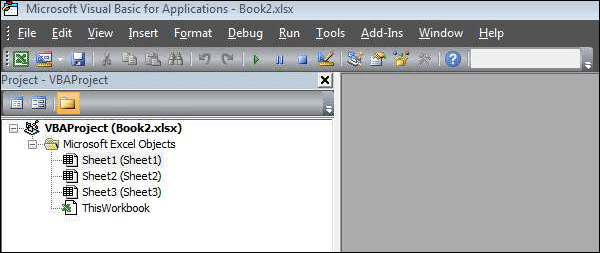
Step 4 − Click the ‘Visual Basic’ button to open the VBA Editor.
Step 5 − Start scripting by adding a button. Click Insert → Select the button.
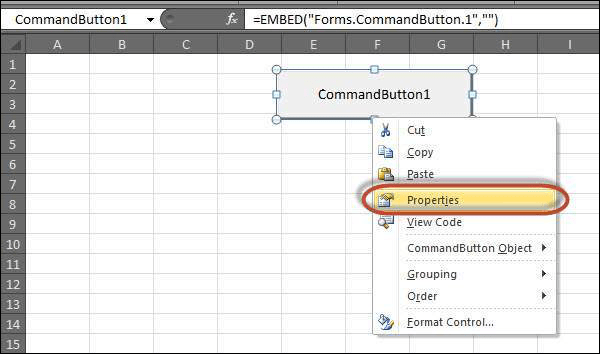
Step 6 − Perform a right-click and choose ‘properties’.
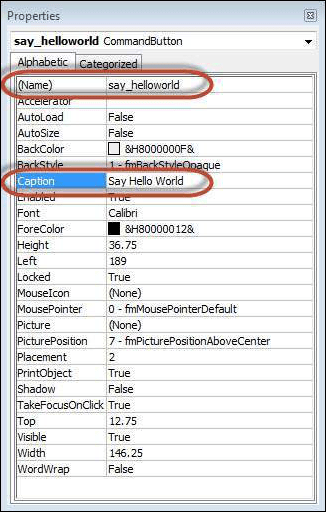
Step 7 − Edit the name and caption as shown in the following screenshot.
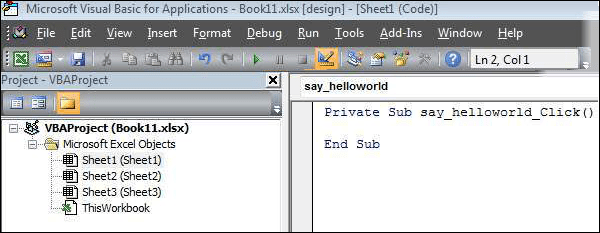
Step 8 − Now double-click the button and the sub-procedure outline will be displayed as shown in the following screenshot.
Step 9 − Start coding by simply adding a message.
Private Sub say_helloworld_Click()
   MsgBox "Hi"
End Sub
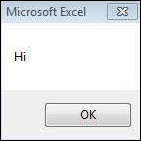
Step 10 − Click the button to execute the sub-procedure. The output of the sub-procedure is shown in the following screenshot. Make sure that you do have design mode turned on. Simply click it to turn it on if it is not on.
Note − In further chapters, we will demonstrate using a simple button, as explained from step#1 to 10. Hence , it is important to understand this chapter thoroughly.
