MySQL is the popular relational database management system used for storing structured data in table formats. It is an open-source database server that uses SQL (Structured Query Language) statements to interact with. The MySQL is freely available under the terms of the GNU General Public License.
This tutorial will help you to install MySQL 8 on Ubuntu 20.04 LTS Focal Linux systems.
Prerequisites
You must have a running Ubuntu 20.04 LTS system with sudo privileged account access. Next, log in to your system and open a terminal.
ssh ubuntu@remote.host Run the below commands to upgrade the current packages to the latest version. The upgrade is optional.
sudo apt update && sudo apt upgrade Step 1 – Enable MySQL PPA
MySQL team provides official MySQL PPA for Ubuntu operating systems. You can download and install the package on your Ubuntu 18.04 system, which will add a PPA file to your system. Run the below command to enable PPA.
wget http://repo.mysql.com/mysql-apt-config_0.8.10-1_all.debsudo dpkg -i mysql-apt-config_0.8.10-1_all.deb
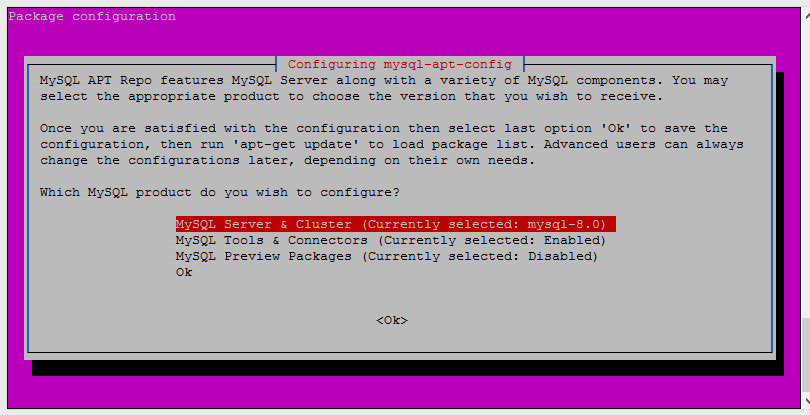
The installer will prompt you to set the default repository for the MySQL version. Make sure the MySQL-8 is set in currently selected. You can change this by navigating to the line and pressing enter.
Once the proper version is selected move the cursor to the last row “Ok” using keyboard up/down keys. Press enter to continue the process.
In case you select the wrong version. Execute dpkg-reconfigure mysql-apt-config command after package installation to get this window again.
Step 2 – Installing MySQL 8 on Ubuntu
Your system is ready for the MySQL installation. Follow the below commands to install MySQL 8 on a Ubuntu 20.04 Linux system.
- Add GPG Key – Run the following commands to install MySQL on Ubuntu 18.04 system.
sudo apt-key adv --keyserver keys.gnupg.net --recv-keys 8C718D3B5072E1F5 - Update cache – Execute the below command to update apt cache on your system.
sudo apt update - Install MySQL – finally install the MySQL server packages.
sudo apt install mysql-server
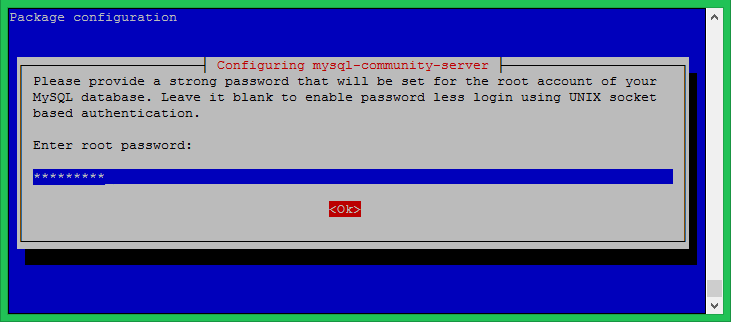
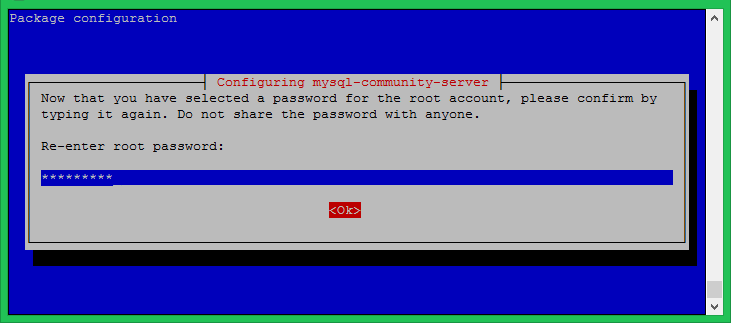
The installation process will prompt for the root password to set as default. Input a secure password and same to confirm password window. This will be MySQL root user password required to log in to MySQL server.
Step 3 – Secure MySQL Installation
Execute the below command on your system to make security changes on your Database server. This will prompt some questions. The do the high security provide all answers to yes.
sudo mysql_secure_installation Here you can enable/disable validate password plugin, Set required strength for passwords, remove anonymous users, disallow root login remotely, Remove test database and access to it and reload the reload privileges after applied changes.
See the below output and action taken by me:
Securing the MySQL server deployment.

Enter password for user root:

VALIDATE PASSWORD PLUGIN can be used to test passwords
and improve security. It checks the strength of password
and allows the users to set only those passwords which are
secure enough. Would you like to setup VALIDATE PASSWORD plugin?

Press y|Y for Yes, any other key for No: y

There are three levels of password validation policy:

LOW    Length >= 8
MEDIUM Length >= 8, numeric, mixed case, and special characters
STRONG Length >= 8, numeric, mixed case, special characters and dictionary file

Please enter 0 = LOW, 1 = MEDIUM and 2 = STRONG: 2
Using existing password for root.

Estimated strength of the password: 50
Change the password for root ? ((Press y|Y for Yes, any other key for No) : y

New password: ****************

Re-enter new password: ****************

Estimated strength of the password: 100
Do you wish to continue with the password provided?(Press y|Y for Yes, any other key for No) : y
By default, a MySQL installation has an anonymous user,
allowing anyone to log into MySQL without having to have
a user account created for them. This is intended only for
testing, and to make the installation go a bit smoother.
You should remove them before moving into a production
environment.

Remove anonymous users? (Press y|Y for Yes, any other key for No) : y
Success.


Normally, root should only be allowed to connect from
'localhost'. This ensures that someone cannot guess at
the root password from the network.

Disallow root login remotely? (Press y|Y for Yes, any other key for No) : y
Success.

By default, MySQL comes with a database named 'test' that
anyone can access. This is also intended only for testing,
and should be removed before moving into a production
environment.


Remove test database and access to it? (Press y|Y for Yes, any other key for No) : y
 - Dropping test database...
Success.

 - Removing privileges on test database...
Success.

Reloading the privilege tables will ensure that all changes
made so far will take effect immediately.

Reload privilege tables now? (Press y|Y for Yes, any other key for No) : y
Success.

All done!
Step 4 – Connect to MySQL
The MySQL server has been installed on your system. Now connect to the MySQL database using the command line. Use the root account password set in the above step.
mysql -u root -p Enter password: ************
Welcome to the MySQL monitor. Commands end with ; or \g.
Your MySQL connection id is 9 Server version: 8.0.23
MySQL Community Server - GPL Copyright (c) 2000, 2021, Oracle and/or its affiliates.
Oracle is a registered trademark of Oracle Corporation and/or its affiliates.
Other names may be trademarks of their respective owners.
Type 'help;' or '\h' for help. Type '\c' to clear the current input statement. mysql>That’s it now you have MySQL 8.0 in your Ubuntu system ready to use. 😎


