The instructions outlined in How to Increase the All-in-One WP Migration Plugin Upload Limit tutorial to work, you can use version 7.27 [Latest] or earlier of the All-in-one WP Migration Plugin.
Step 1. First, make sure the plugin is installed and it is inactive. Then we need to edit it. Go to Plugins / Editor.

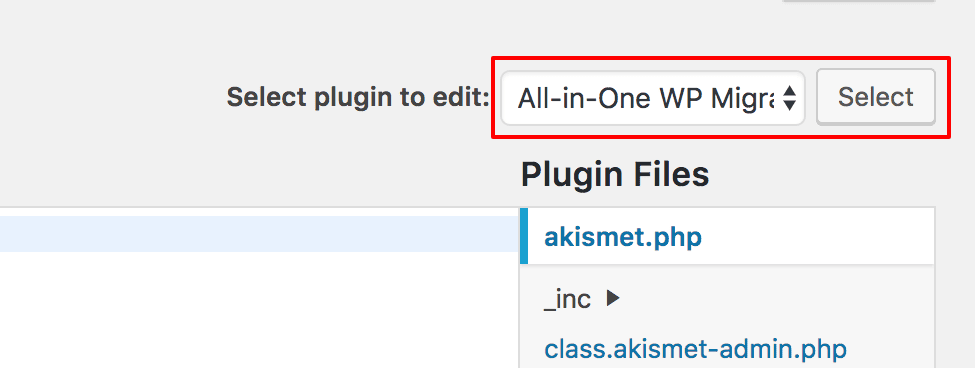
Step 2. Select the All-in-One WP Migration from the dropdown and press Select to select it.

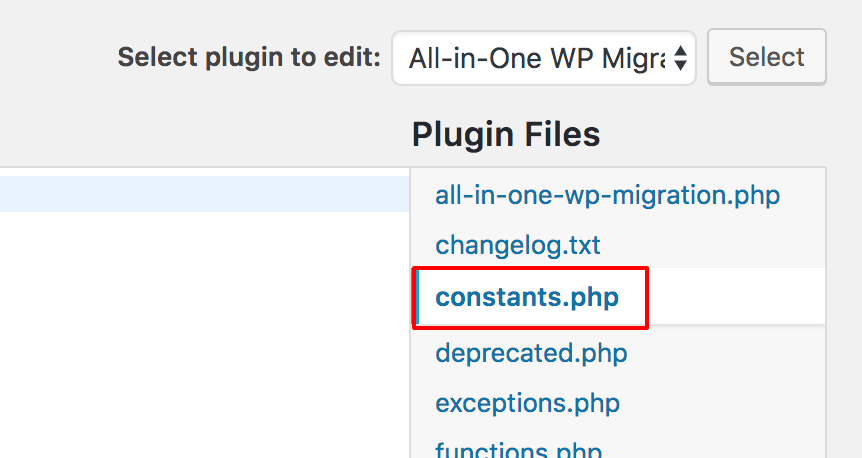
Step 3. In the Plugin Files, click on constants.php to edit it.

Step 4. Look/ Search for Max File Size, or in this example, it’s in line 284. You will see something like this.
// =================
// = Max File Size =
// =================
define( ‘AI1WM_MAX_FILE_SIZE’, 2 << 28 );
Step 5. Now replace this with
// =================
// = Max File Size =
// =================
define( 'AI1WM_MAX_FILE_SIZE', 2 << 28 *1.2);
And you will have 16 GB upload limit now.
Or
replace it with
// =================
// = Max File Size =
// =================
define( 'AI1WM_MAX_FILE_SIZE', 10737418240 );
where 10737418240 is in bytes, you can enter any number corresponding to upload limit you want 😎
this will increase upload limit to 10 GB as shown below.

Feel free to use comment section in case of any concern/doubt. Enjoy 😊